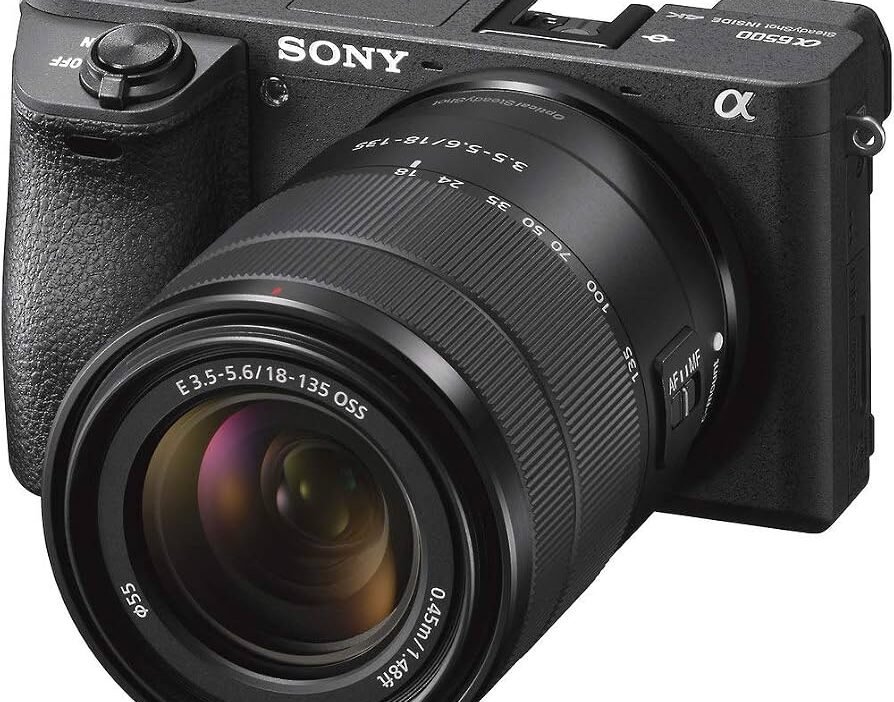
The Sony A6500 remains a capable mirrorless camera for photography, filmmaking, music videos, interviews, and independent video production. Its ability to record 4K video and use advanced picture profiles makes it attractive to filmmakers who want more control over their footage during editing.
However, one problem can frustrate users who want cinematic results: noise in S-Log3 footage.
You might record a video that looks reasonably clean on your camera’s screen, only to discover visible grain when you import it into Adobe Premiere Pro. After increasing contrast, adjusting exposure, or applying a colour grade, the noise may become even more noticeable. Dark areas can look rough, skin tones may lose their smooth appearance, and shadows can become difficult to work with.
If you have experienced this, you are not alone. The problem does not necessarily mean your camera is faulty or that you are using the wrong editing software.
The most important thing to understand is that S-Log3 does not eliminate noise. It provides a different way of recording tonal information, and its results depend heavily on exposure, lighting, and post-production.
Sony also specifically warns that noise can be more noticeable in dark areas when using S-Log2 or S-Log3. The company recommends testing the picture profile in advance and notes that recording with a brighter exposure may help, although doing so can reduce the available dynamic range. You can find this guidance in the official Sony A6500 Picture Profile Help Guide.
In this guide, we will examine why Sony A6500 S-Log3 footage looks noisy, how to improve your exposure, when to consider Cine2 instead, and how to reduce noise in Adobe Premiere Pro without making your footage look unnaturally soft.
1. What Is S-Log3, and Why Do Filmmakers Use It?
S-Log3 is a logarithmic gamma curve developed by Sony for recording video intended for colour grading.
Rather than producing a finished-looking image directly in the camera, S-Log3 records tonal information in a way designed to provide flexibility during post-production.
This can be useful when a scene contains both bright highlights and darker areas. It gives filmmakers greater control over the appearance of their footage when making colour adjustments.
For example, imagine filming a person standing beside a window.
The daylight outside may be much brighter than the room behind the subject. When recording, you need to manage the difference between these brightness levels so that the important parts of the scene retain useful detail.
S-Log3 can be helpful in this situation because it is designed for a grading workflow.
However, the resulting footage often looks flat and desaturated before correction. This is intentional. The recording is not necessarily supposed to look like the finished image.
During editing, you adjust the exposure, contrast, white balance, and colour to create the final appearance.
Does S-Log3 automatically produce better video?
No.
A logarithmic profile is a tool, not a guarantee of better image quality.
S-Log3 may be useful when you have sufficient light, a scene with challenging highlights, and time to grade the footage properly.
It may be less suitable when you are recording in a dark room, working quickly, or using limited lighting equipment.
A correctly exposed video recorded with a more conventional profile can look better than poorly exposed S-Log3 footage.
The objective is not to use the flattest picture profile possible. It is to record the cleanest, most useful image for the situation.
2. Why Does Sony A6500 S-Log3 Footage Look Noisy?
Several factors can contribute to visible noise. Understanding the cause is important because each problem requires a slightly different solution.
Reason 1: The footage is underexposed
Underexposure is one of the first things to investigate when S-Log3 footage looks noisy.
Consider recording a person in a room with limited light. The subject’s face may appear relatively dark, particularly around the eyes and on the side facing away from the light source.
When you brighten the image in Premiere Pro, you also make the noise in the darker areas more visible.
The problem is not simply that you increased the brightness. The original recording may not contain enough clean image information in those areas to withstand the adjustment.
This is why lifting a heavily underexposed image can produce disappointing results.
How to improve it:
- Add more light to the scene when possible.
- Open your lens aperture if you have room to do so.
- Choose an appropriate shutter speed for your intended frame rate.
- Adjust ISO when necessary, while considering the trade-offs.
- Check exposure before recording rather than relying entirely on post-production.
Do not deliberately record an extremely dark image on the assumption that you can recover everything later.
Reason 2: You are recording in a low-light environment
The Sony A6500 can produce useful video in a variety of conditions, but it has limitations.
A camera cannot capture a clean image from light that is not available. When the scene is dark, the recorded image may contain more visible noise, particularly in shadow areas.
This can become a problem during indoor interviews, nighttime street scenes, music videos, and studio shoots with insufficient illumination.
For example, if you are filming a performer against a dark backdrop, the background may look attractive on the camera screen. However, after increasing contrast and brightness in post-production, noise may become visible in the background and darker parts of the subject.
How to improve it:
Use a light source to illuminate the subject instead of immediately increasing ISO.
Depending on the scene, you could use:
- A soft LED light.
- A window as a natural light source.
- A reflector to redirect existing light.
- A practical lamp positioned to support the composition.
- A second light to separate the subject from the background.
You do not always need expensive lighting equipment. Even a carefully positioned affordable light can improve the amount of usable light reaching your subject.
The goal is not to make every part of the frame equally bright. It is to provide sufficient illumination where the important visual information needs to be captured.
Reason 3: You are raising ISO too far
ISO affects how sensitive the camera’s recording system is to light, and higher ISO settings can make noise more visible.
Sony’s A6500 documentation explains that increasing ISO can increase visible noise. Its available ISO range also depends on the recording mode and settings.
When S-Log3 is enabled, the camera’s available minimum ISO differs from that of more conventional profiles.
This means that you should not assume that the ISO setting you normally use for Cine2 will behave identically when you switch to S-Log3.
How to improve it:
Start by using an appropriate exposure and the lowest practical ISO setting that allows you to record the scene correctly.
However, do not treat low ISO as an absolute rule.
If the image is too dark at your current ISO, refusing to increase it can leave you with underexposed footage that becomes noisy when brightened later.
Instead, evaluate your available light, aperture, shutter speed, and ISO together.
For official information about ISO operation and available settings, consult the Sony A6500 ISO Help Guide.
Reason 4: You are applying too much contrast during grading
S-Log3 footage generally needs colour correction before it looks finished.
However, some filmmakers immediately increase contrast, pull down shadows, raise saturation, and apply a cinematic LUT without first checking the original exposure.
This can make existing noise much more noticeable.
For example, suppose your footage contains a dark wall behind a subject. If you push the shadows down aggressively and then increase exposure elsewhere, the wall may develop uneven patches, visible grain, or distracting texture.
The same issue can affect dark clothing and hair.
How to improve it:
Begin with a balanced correction.
- Check the original exposure.
- Correct obvious white-balance problems.
- Establish a natural brightness level.
- Add contrast gradually.
- Adjust saturation only after evaluating the image.
- Inspect dark areas at normal playback size and at a closer viewing scale.
Avoid using contrast as a substitute for correcting exposure.
A cinematic image does not require every shadow to be completely black or every highlight to be bright.
Reason 5: Your noise reduction settings are too aggressive
Noise reduction can help, but excessive processing introduces its own problems.
When noise reduction is too strong, skin can lose texture, hair can become soft, and moving subjects may develop smearing or other unwanted artefacts.
This is especially noticeable when the original footage already lacks detail.
How to improve it:
Apply noise reduction conservatively.
Look for a balance between reducing distracting noise and preserving important detail.
If your editing software offers temporal noise reduction, compare its results carefully with simpler spatial methods. Temporal techniques analyse information across multiple frames, but their effectiveness depends on the footage and implementation.
Do not assume that the strongest available setting will produce the best image.
3. What ISO Should You Use for S-Log3 on the Sony A6500?
There is no single ISO setting that guarantees noise-free footage in every situation.
The appropriate setting depends on the available light, the lens, the frame rate, the shutter speed, the desired depth of field, and the way you intend to grade the recording.
This is particularly important on the Sony A6500 because S-Log3 has different exposure requirements from conventional gamma profiles.
Should you always shoot at ISO 800?
No.
A particular ISO value should not be treated as a universal solution to noise.
Even if an ISO setting is commonly recommended for a specific camera or profile, the correct exposure still matters.
If you record an underexposed subject at ISO 800 and then raise the exposure substantially during editing, the final image may still contain significant noise.
Likewise, if your scene is well lit, using an unnecessarily high ISO may provide no advantage.
Before recording, consider the following:
- Is the subject receiving enough light?
- Are the important highlights within the recording’s usable range?
- Is the aperture appropriate for the desired depth of field?
- Is the shutter speed suitable for the frame rate?
- Can you improve the lighting before increasing ISO?
The objective is to obtain a well-exposed image without unnecessarily sacrificing highlights or creating excessive noise.
How should you expose S-Log3?
Use the camera’s exposure tools rather than judging everything by the appearance of the flat image on the LCD.
The Sony A6500 provides a Gamma Display Assist function for monitoring footage recorded using S-Log gamma settings. Its zebra function can also help you assess brightness levels.
These tools are useful because the recorded logarithmic image may look quite different from the intended final grade.
If you are unfamiliar with your camera’s monitoring tools, practise with a simple scene before using S-Log3 on an important shoot.
For example, record a person standing near a window. Make a few short test clips at different exposure levels while keeping the lighting and composition as consistent as possible.
Review the clips on a larger screen and grade each one using the same general workflow.
This comparison will help you understand how exposure affects the final result on your particular camera.
Do not assume that a brighter recording is always better. If you expose too aggressively, you may lose highlight detail that cannot be recovered later.
4. How to Get Cleaner S-Log3 Footage Indoors
Indoor recording can be challenging because the amount of available light varies considerably between rooms.
A bright office with large windows is very different from a bedroom illuminated by a single bulb.
If you are filming interviews, music videos, or personal-brand content indoors, start by evaluating the lighting before changing your camera settings.
Step 1: Position the subject near a useful light source
A window can provide a large, soft source of light.
Position your subject so that the window illuminates the face in a way that suits the scene.
You can place the subject facing the window for a relatively bright look, or position the window to one side for more dimensional lighting.
Pay attention to the background as well. A bright window behind a subject can create a difficult exposure situation if the face is much darker than the exterior.
Step 2: Open the aperture when appropriate
If you are using a lens with a wide maximum aperture, opening it allows more light to reach the sensor.
For example, a 35mm f/1.7 lens can admit more light at f/1.7 than at f/4, although depth of field and lens performance also change.
A wider aperture can help when shooting in low light, but it is not always the best choice.
If you need multiple people to remain in focus, you may need a narrower aperture and additional lighting.
Step 3: Use a suitable shutter speed
Your shutter speed affects motion rendering and the amount of light recorded.
For a conventional cinematic appearance, filmmakers often begin with a shutter speed approximately twice the frame rate.
Examples include:
| Frame rate | Common starting shutter speed |
| 24 fps | 1/48 or 1/50 second |
| 25 fps | 1/50 second |
| 30 fps | 1/60 second |
| 50 fps | 1/100 second |
| 60 fps | 1/120 second |
These are starting points rather than strict rules.
If you increase the shutter speed significantly, you reduce the exposure and may make noise more difficult to manage in low light.
If you slow it too much, motion may look less natural or become blurred.
For filming in Nigeria, where mains-powered lighting is commonly associated with 50 Hz electrical frequency, it is also worth testing for flicker when using artificial lights. The appropriate shutter speed depends on the light source and recording frame rate.
Step 4: Add a light instead of relying entirely on ISO
If the scene is too dark, consider adding light before increasing ISO substantially.
A small LED light placed at an appropriate angle may be sufficient for a close-up or interview.
If you are filming a music video, you can also use lighting creatively to shape the subject and separate them from the background.
The goal is not simply to make the image brighter. It is to create a lighting arrangement that supports the mood while providing enough light for a clean recording.
5. Is Cine2 Better Than S-Log3 on the Sony A6500?
For some filmmakers, yes.
Cine2 and S-Log3 serve different purposes, and neither is automatically superior in every situation.
S-Log3 is designed for footage that will be processed during post-production. It can provide useful flexibility when you need to manage a scene’s tonal range.
Cine2 is another gamma option available through the A6500’s Picture Profile system. Depending on the scene and exposure, it can provide a useful starting point for a more straightforward grading workflow.
Sony lists Cine2 and S-Log3 among the camera’s available gamma options in its official A6500 documentation.
When Cine2 may be the better choice
Consider Cine2 when:
- You are filming in a room with limited light.
- You want a straightforward colour-grading workflow.
- You need to deliver a project quickly.
- You do not need the additional flexibility of a logarithmic recording.
- You prefer a more immediately usable image.
Cine2 is not a magical noise-removal setting. The quality of the final image will still depend on exposure, lighting, and your camera’s limitations.
However, a profile that suits your workflow can make it easier to achieve consistent results.
When S-Log3 may be worth using
S-Log3 may be useful when:
- You have enough light to expose the scene carefully.
- You need flexibility when grading challenging lighting.
- You want to match footage within a controlled production.
- You are comfortable evaluating exposure and correcting the footage.
- You have time to test the profile before recording important material.
If you are still learning exposure and colour grading, you may find it easier to begin with Cine2 and introduce S-Log3 when a particular project benefits from it.
The most important consideration is the quality of the footage you can consistently produce, not whether you are using the most advanced-looking picture profile.
6. How to Reduce Sony A6500 S-Log3 Noise in Adobe Premiere Pro
If you already have noisy footage, you can often improve its appearance in post-production.
However, it is important to understand the limits of editing.
Noise reduction can make distracting grain less noticeable, but it cannot fully restore image detail that was never captured.
A clip that is severely underexposed may remain visibly compromised even after careful correction.
Here is a practical workflow to try in Adobe Premiere Pro.
Step 1: Duplicate your original footage
Before making significant adjustments, create a duplicate of your clip or sequence.
This gives you a clean reference for comparing the original recording with the corrected version.
It also helps you avoid losing track of the changes you have made.
Step 2: Evaluate the original recording
Watch the footage before applying a LUT or making major colour adjustments.
Ask yourself:
- Is the noise visible throughout the image or mainly in shadows?
- Is the subject underexposed?
- Are the highlights already clipped?
- Is the noise static, or does it change from frame to frame?
- Does the clip contain enough detail to support a strong grade?
These questions help you determine whether the problem is primarily exposure-related, noise-related, or a combination of both.
Step 3: Correct exposure carefully
Open the Lumetri Color panel and use its Basic Correction and tonal controls to establish a sensible starting point.
Adjust exposure and brightness gradually.
If the footage is dark, you may need to brighten it, but watch what happens to the shadows as you make adjustments.
Avoid lifting the entire image unnecessarily if the subject is already exposed correctly.
Likewise, do not crush the shadows merely to conceal noise. Doing so may hide the problem while sacrificing important detail.
Step 4: Correct white balance
Use the temperature and tint controls to correct obvious colour casts.
For example, footage recorded under mixed lighting may have a warm face and a greenish background.
Correcting white balance before making creative colour adjustments can help you produce a more consistent image.
However, do not expect white-balance correction to remove luminance noise. It addresses colour accuracy, not the underlying amount of noise in the recording.
Step 5: Apply a suitable S-Log3 conversion or correction
S-Log3 footage usually requires a suitable transformation or grading process to achieve a normal-looking contrast and colour response.
Depending on your workflow, you may use a compatible technical LUT or perform the correction manually.
If you use a LUT, confirm that it is intended for your recording gamma and colour space.
Do not assume that every LUT labelled cinematic or Sony is suitable for every picture profile.
Apply the conversion after assessing the original footage and check whether the result creates excessive contrast or reveals distracting noise.
A LUT cannot restore image information that was not captured.
Step 6: Reduce noise conservatively
Adobe Premiere Pro’s standard colour-correction controls are not a complete dedicated noise-reduction solution.
Depending on your version of Premiere Pro and your installed effects, you may need a compatible third-party noise-reduction plugin or a separate application that supports video noise reduction.
If you use a dedicated tool, begin with modest settings and compare the result with the original clip.
Pay particular attention to:
- Skin texture.
- Hair and fine details.
- Dark backgrounds.
- Moving hands and faces.
- Areas containing subtle texture.
If the image becomes waxy or smeared, reduce the strength of the effect.
The best result is usually a natural-looking image with less distracting noise, not a completely textureless image.
Step 7: Finish the creative grade
Once the footage has been corrected and any necessary noise reduction has been applied, refine the visual style.
You can adjust contrast, saturation, highlights, shadows, and colour balance to match the mood of the project.
For a fashion video, you may want controlled highlights and rich but natural skin tones.
For a music video, you might prefer a more stylized colour palette.
Whatever look you choose, make sure the subject remains clear and the grade does not introduce new problems.
Step 8: Compare the before-and-after results
Review the original and corrected clips side by side.
Check the image at the resolution you intend to deliver, and also inspect it more closely for artefacts.
Ask yourself:
- Is the noise less distracting?
- Does the skin still look natural?
- Have fine details been preserved?
- Are the highlights still controlled?
- Does the image look consistent throughout the clip?
If the corrected footage looks worse, revisit the exposure and grading adjustments rather than automatically increasing noise reduction.
7. Common Mistakes That Make S-Log3 Noise Worse
Understanding what not to do can save you considerable time during editing.
Mistake 1: Recording a dark image and trying to fix everything later
This is one of the most difficult problems to solve in post-production.
If the important parts of the scene are severely underexposed, increasing brightness later may reveal distracting noise.
Better approach: Improve the lighting and exposure before recording whenever possible.
Mistake 2: Applying a cinematic LUT immediately
A creative LUT may introduce contrast and saturation before you have corrected the footage.
That can make existing problems more obvious.
Better approach: Evaluate the original clip, establish a sensible exposure and white balance, and then apply the appropriate transformation or creative grade.
Mistake 3: Assuming lower ISO always produces a cleaner final image
A lower ISO setting does not automatically produce better footage if it leaves the recording too dark.
The right decision depends on the actual exposure and available light.
Better approach: Evaluate ISO alongside aperture, shutter speed, lighting, and the scene’s brightness.
Mistake 4: Ignoring the lighting
A picture profile cannot compensate for every lighting problem.
If a subject is poorly illuminated, colour grading may not produce the result you want.
Better approach: Learn to position your subject and light sources effectively.
Mistake 5: Overusing noise reduction
Strong noise reduction may hide grain but can also destroy natural texture.
Better approach: Use a conservative setting and inspect the image at its intended delivery size.
Mistake 6: Judging the footage only on the camera screen
A small camera display may not reveal every issue that becomes visible on a larger monitor.
Better approach: Record short tests and inspect them in your editing environment before committing to a major shoot.
8. A Simple Test to Find the Best Settings for Your Sony A6500
If you are unsure whether S-Log3 or Cine2 is the better choice, run your own comparison.
You do not need an expensive studio to do this.
You can perform the test with your camera, a lens, a subject, and a consistent source of light.
What you need
- Sony A6500.
- Your usual lens.
- A subject with visible skin texture.
- A room with controllable lighting.
- A tripod or stable support, if available.
- Adobe Premiere Pro or another suitable editing application.
Step 1: Choose a simple scene
Position a person near a window or under a consistent artificial light source.
Include a darker area in the background so that you can evaluate noise in the shadows.
Keep the composition and lighting consistent throughout the test.
Step 2: Record a Cine2 clip
Choose your usual Cine2 settings and record a short clip.
Make sure the exposure is appropriate for the scene.
Note the aperture, shutter speed, ISO, frame rate, and white balance.
Step 3: Record an S-Log3 clip
Switch to S-Log3 and record the same composition.
Remember that S-Log3 has different ISO requirements, so you may need to adjust your settings to obtain an appropriate exposure.
Do not simply copy every setting from the Cine2 clip and assume the exposure will be equivalent.
Step 4: Repeat the test if necessary
If you want to understand the effects of exposure, record additional clips with small, controlled changes.
For example, you might test different lighting levels or exposure adjustments while keeping other variables as consistent as possible.
Avoid changing everything simultaneously, because that makes it difficult to identify the cause of the differences.
Step 5: Grade both clips
Use a consistent approach to correcting white balance, exposure, and contrast.
Aim for comparable final brightness and colour rather than judging the flat S-Log3 recording against the more finished-looking Cine2 recording.
Step 6: Compare the final results
Look closely at the following areas:
| What to examine | What you want to learn |
| Skin tones | Which recording produces the more natural result? |
| Dark background | Which clip retains cleaner shadow detail? |
| Highlights | Which clip preserves important bright areas? |
| Fine details | Which clip maintains texture without excessive noise reduction? |
| Grading flexibility | Which clip is easier to adjust for your intended look? |
| Editing time | Which workflow helps you deliver projects efficiently? |
There is no need to assume that one profile will win every category.
Your results may change depending on the lighting and the intended look.
The purpose of the test is to discover which approach works best for your camera and the situations in which you normally shoot.
9. Should You Stop Using S-Log3 on the Sony A6500?
Not necessarily.
S-Log3 remains a useful option when you understand its requirements and can expose the footage appropriately.
However, if you frequently work in low light, have limited lighting equipment, or need a quick editing workflow, Cine2 may be more practical for some projects.
For example, a controlled studio shoot with sufficient light may be a good opportunity to use S-Log3.
A fast-moving event in a dimly lit room may be better served by a simpler profile that you can expose and process reliably.
Neither decision makes you a better or worse filmmaker.
Professional results come from choosing suitable settings for the situation, managing light, maintaining consistent exposure, and making informed decisions during post-production.
The goal is to use the camera in a way that supports your creative work rather than forcing every project into the same technical workflow.
Frequently Asked Questions
Why is my Sony A6500 S-Log3 footage grainy even at ISO 800?
ISO 800 does not guarantee noise-free footage. The result also depends on exposure, lighting, the amount of detail in the shadows, and how the image is processed.
If the scene is too dark, brightening it in post-production may reveal visible noise even when you recorded at a relatively modest ISO.
Is Cine2 better than S-Log3 for low-light video?
Cine2 can be a practical choice when you want a simpler recording and grading workflow. However, neither profile eliminates the limitations of low-light recording.
The better option depends on the scene, your exposure, the amount of available light, and the flexibility you need during editing.
Can Premiere Pro remove all noise from my footage?
No. Noise reduction can improve the appearance of noisy footage, but it cannot perfectly reconstruct detail that was not captured.
Strong processing can also introduce softness and other unwanted artefacts.
Should I increase exposure when shooting S-Log3?
You should aim for an exposure that provides clean image information while protecting important highlights.
Recording somewhat brighter can help reduce the visibility of noise in some situations, but excessive exposure can sacrifice highlight detail and reduce the dynamic range available for grading.
Test your settings under the lighting conditions you expect to encounter.
Does S-Log3 always produce better cinematic footage?
No. S-Log3 is a recording option designed for post-production, not an automatic cinematic effect.
Lighting, composition, exposure, camera movement, lens choice, and editing all contribute to the final result.
Is the Sony A6500 still useful for video production?
Yes. The camera can still be useful for personal projects, interviews, music videos, portraits, and other productions when its capabilities suit the job.
Its performance will depend on the recording conditions, your technique, and the requirements of the final delivery.
Final Thoughts
Noise in Sony A6500 S-Log3 footage is frustrating, particularly when you are trying to achieve a clean, professional-looking grade.
However, the solution usually begins before you open your editing software.
Evaluate the available light, expose the scene carefully, choose an appropriate ISO, and avoid recording important details too dark in the expectation that you can recover everything later.
During editing, correct the footage methodically and use noise reduction only when it improves the image without destroying detail.
Most importantly, do not assume that S-Log3 is the right choice for every project.
If Cine2 gives you cleaner, more consistent results in your usual shooting conditions, there is nothing wrong with using it.
A well-exposed video with natural colours and controlled noise will generally serve your project better than a poorly exposed recording made with a more demanding picture profile.
The best picture profile is the one that helps you produce the strongest footage for the scene you are filming.