Natural light is one of the easiest and most affordable ways to improve your portrait photography. You don’t need expensive studio lights to create beautiful portraits. With the right position, time of day and camera settings, sunlight can produce soft, flattering and professional-looking images.
Why Natural Light Is Great for Portraits
Natural light is available almost everywhere and can create a variety of different looks.
Depending on the time of day and weather, you can get:
- Soft and flattering light
- Dramatic shadows
- Warm golden tones
- Bright and clean portraits
- Moody editorial images
Learning to control natural light can make a big difference, especially if you’re just starting photography.
1. Shoot During Golden Hour
Golden hour is the period shortly after sunrise or before sunset when the sunlight is lower and warmer.
This can create beautiful portraits with:
- Warm skin tones
- Soft highlights
- Long shadows
- Beautiful background separation
For outdoor portraits, golden hour is one of the easiest times to get attractive natural light.
However, you don’t have to shoot only during golden hour. With the right technique, you can create good portraits throughout the day.
2. Use Open Shade During Harsh Sunlight
Direct midday sunlight can create harsh shadows underneath the eyes and nose.
Instead of putting your subject directly under the sun, look for open shade.
Examples include:
- The side of a building
- A covered walkway
- The shadow of a large tree
- A shaded area beside a building
Position your subject near the edge of the shade so they still receive plenty of soft natural light.
This can produce much more flattering skin tones.
3. Use a Window for Indoor Portraits
You don’t need a studio to create beautiful indoor portraits.
A large window can act as a natural softbox.
Place your subject near the window and experiment with their position.
For a soft portrait, try positioning the subject at an angle to the window rather than facing it completely straight on.
You can also move the subject farther away from the window to reduce the intensity of the light.
4. Avoid Direct Midday Sun When Possible
Shooting directly under strong midday sunlight can be challenging.
The light can create:
- Dark eye sockets
- Harsh shadows
- Bright highlights
- Uneven skin tones
- Squinting
If you must shoot during midday, look for shade or use a reflector to control the light.
Another option is to position the sun behind your subject and expose carefully for the face.
5. Try Backlighting
Backlighting means placing the main light source behind your subject.
For example, position your subject between the camera and the sun.
This can create:
- Hair highlights
- Glowing edges
- Soft background light
- A dreamy appearance
Be careful with exposure because your camera may see the bright background and underexpose the subject’s face.
You may need to adjust your exposure or use a reflector to bounce light back onto the subject.
6. Use a Reflector
A reflector is one of the simplest accessories you can use with natural light.
It doesn’t create light itself.
Instead, it reflects existing light back toward your subject.
A white reflector can provide soft fill light.
A silver reflector provides stronger reflected light.
A gold reflector can create a warmer appearance.
If you’re working alone, even a simple inexpensive reflector can be useful.
7. Pay Attention to the Background
Beautiful lighting won’t automatically make a portrait look good.
Before taking the photograph, check what’s behind your subject.
Look for:
- Distracting objects
- Bright spots
- People walking behind the subject
- Poles appearing to come out of the subject’s head
- Clutter
- Strongly contrasting colours
Sometimes simply moving your subject a few steps can dramatically improve the composition.
8. Use Your Subject’s Position to Control the Light
Small changes in position can completely change a portrait.
Ask your subject to:
- Turn slightly toward the light
- Turn slightly away from the light
- Move closer to the window
- Move farther from the window
- Look toward the light source
Take a few test photographs and compare them.
You don’t always need to change your camera settings. Sometimes you simply need to move the person.
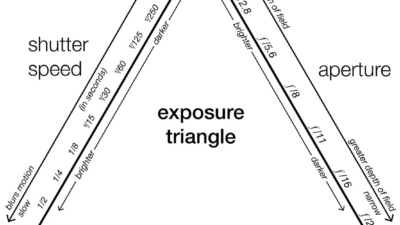
9. Use a Wide Aperture Carefully
If you’re using a camera with a fast lens, you may want to shoot at a wide aperture such as:
f/1.8
or
f/2
This can create beautiful background separation.
However, remember that a wide aperture gives you a shallower depth of field.
Make sure the subject’s eyes are properly focused.
If you’re photographing a group, consider using a smaller aperture such as f/4 or f/5.6 to keep more people in focus.
10. Watch Your Exposure
Natural light can change quickly.
Clouds can cover the sun, people can move into shade and the sun can become brighter.
Before shooting, check your exposure.
Pay attention to:
- Highlights
- Skin tones
- Shadows
- Histogram
- Zebras, if your camera has them
Try to avoid severely overexposing important areas such as the face.
11. Cloudy Days Can Be Excellent for Portraits
Don’t assume that you need bright sunshine to take beautiful portraits.
Clouds can act like a giant natural diffuser.
On an overcast day, the light can become:
- Soft
- Even
- Flattering
- Easy to work with
This can be particularly useful for portraits because you don’t have to deal with extremely harsh shadows.
12. Experiment With Shadows
Not every portrait needs to have perfectly even lighting.
Shadows can add depth and atmosphere.
Try shooting near:
- Window blinds
- Trees
- Buildings
- Doorways
- Architectural structures
Patterns of light and shadow can create a more editorial appearance.
13. Use Doors and Windows as Natural Light Sources
Doorways are another excellent source of natural light.
Place your subject near an open doorway and position yourself inside or just outside the entrance.
The doorway can naturally frame your subject while providing directional light.
This technique works particularly well for:
- Fashion portraits
- Environmental portraits
- Wedding preparation
- Lifestyle photography
14. Don’t Forget White Balance
Natural light isn’t always the same colour.
Sunrise and sunset can be warm.
Shade can appear cooler.
Cloudy conditions can also change the colour of the light.
If your camera is constantly changing white balance between photographs, your images may have inconsistent colours.
For a consistent set of portraits, consider using a fixed white balance rather than relying entirely on Auto White Balance.
15. Move Around Your Subject
Don’t take every portrait from the same position.
Walk around your subject and observe how the light changes.
Try:
Front light
The light illuminates the front of the subject.
Side light
The light comes from one side, creating more dimension and shadows.
Backlight
The light comes from behind the subject.
45-degree light
The light comes from slightly to the side and above, often creating flattering facial definition.
Moving yourself can sometimes be more effective than changing your camera settings.
A Simple Natural-Light Portrait Setup
If you’re shooting outdoors, try this simple setup:
Time: Late afternoon
Location: Open shade
Subject: Positioned near the edge of the shade
Camera: Aperture Priority or Manual
Aperture: Around f/2–f/2.8 for a single subject
ISO: Keep it as low as practical
Focus: Eye AF or a suitable focus point
White Balance: Daylight or a consistent manual setting
Then adjust based on the actual lighting.
Common Natural-Light Mistakes to Avoid
Shooting Directly Under Harsh Sun
This can create unattractive shadows and make your subject uncomfortable.
Ignoring the Background
A beautifully lit subject can still produce a poor photograph if the background is distracting.
Overexposing the Face
Bright skin highlights can be difficult to recover, especially if they’re completely clipped.
Always Shooting From One Angle
Move around and find the direction where the light looks best.
Forgetting About the Time of Day
The quality and direction of sunlight change throughout the day.
Final Thoughts
Natural light is one of the most powerful tools available to a photographer.
You don’t need expensive lighting equipment to start creating beautiful portraits. Learn to observe the direction, quality and intensity of the light around you.
Start with simple techniques such as shooting during golden hour, using open shade, positioning subjects near windows and experimenting with backlighting.
Most importantly, don’t just look at your subject—look at the light.
Once you learn how to see light, you’ll start finding portrait opportunities almost everywhere.
Frequently Asked Questions
What is the best natural light for portraits?
Soft light during golden hour, open shade and overcast conditions can all work well for portraits. The best option depends on the look you’re trying to create.
Is direct sunlight good for portrait photography?
It can be, but strong direct sunlight creates harsh shadows. Open shade or backlighting can make midday sunlight easier to work with.
Is cloudy weather good for portraits?
Yes. Clouds can diffuse sunlight and create soft, even illumination that’s often flattering for portraits.
What time is best for outdoor portraits?
The period around sunrise and sunset is popular because the light is generally softer and warmer. However, good portraits can be created at other times with proper positioning.
Do I need a reflector for natural-light portraits?
No, but a reflector can help fill in shadows and give you more control over the light.
What aperture should I use for natural-light portraits?
For a single subject, f/1.8–f/2.8 can provide attractive background separation. If you’re photographing multiple people, consider a smaller aperture to increase depth of field.
Can I take professional portraits without studio lights?
Absolutely. Natural light can produce professional results when you understand how to position your subject and control the available light.