Smartphones have become surprisingly capable photography tools. Modern phones can produce sharp, detailed images in good lighting, but getting better results is not only about having an expensive phone. Knowing how to use light, composition, focus, exposure, and your phone’s camera properly can make a noticeable difference.
Whether you are taking portraits, food photos, travel pictures, products, or everyday moments, a few simple techniques can help your phone photos look more professional.
Clean Your Camera Lens
Why a Clean Lens Matters
One of the easiest photography tips is also one of the most commonly overlooked: clean your camera lens before taking pictures.
Your phone spends most of its time in your pocket, bag, or hand, so fingerprints, dust, and oil can easily collect on the lens. This can make photos look hazy, reduce contrast, and create unwanted glare around bright light sources.
Use a soft microfiber cloth to gently clean the lens. Avoid using rough materials that could scratch the camera glass.
Check the Lens Before Important Photos
If you are about to photograph an important event, portrait, or product, quickly check the camera lens first. A few seconds of cleaning can make a noticeable difference.
Use Natural Light Whenever Possible
Face Your Subject Toward the Light
Light is one of the biggest factors affecting photo quality. When taking a portrait, try positioning your subject so that they face a soft light source, such as a large window or an area of open shade.
This can produce more even lighting across the face and reduce harsh shadows.
Avoid Extremely Harsh Direct Sunlight
Shooting under strong midday sunlight can create dark shadows around the eyes and very bright areas on the skin. If you must shoot outdoors during strong sunlight, look for shade or use a building, wall, or other object to soften the light.
Early morning and late afternoon can also provide more flattering natural light.
Tap to Focus on Your Subject
Choose the Important Part of the Image
Most smartphone cameras automatically decide what they think should be in focus. However, the camera may not always choose the subject you want.
Before taking the photo, tap the screen on your main subject. For portraits, this is usually the person’s face or eyes.
This helps the camera understand what you want to prioritize.
Lock Focus When Necessary
Some phones allow you to lock focus and exposure by pressing and holding on the subject. This can be useful when shooting a subject that moves slightly or when the lighting is changing.
Control Your Exposure
Don’t Always Rely on Automatic Brightness
After tapping your subject, many smartphones allow you to adjust the brightness by moving an exposure control up or down.
If the image looks too bright, reduce the exposure slightly. If your subject is too dark, increase it.
The goal is not necessarily to make the entire image bright. You want to preserve important details in both the bright and dark areas.
Protect Highlights
Bright areas such as white clothing, windows, skies, and light-colored walls can lose detail when they are overexposed.
When you are unsure, slightly reducing exposure can sometimes help preserve more detail that you can work with later during editing.
Use the Grid for Better Composition
Turn on the Camera Grid
Most smartphones have an option to display grid lines over the camera preview. Turning this feature on can make composition easier.
The grid divides the frame into sections that can help you position your subject more intentionally.
Try the Rule of Thirds
Instead of placing your subject directly in the middle every time, try positioning them near one of the grid intersections.
For example, when photographing a person outdoors, you could place them toward one side of the frame and leave some space in the direction they are looking.
This can create a more balanced and natural-looking photograph.
Avoid Digital Zoom When Possible
Move Closer to Your Subject
Digital zoom can reduce image quality because the phone is essentially cropping into the image.
When possible, move closer to your subject instead of zooming heavily.
This is particularly important when photographing people, products, or details where sharpness matters.
Use Optical or Telephoto Cameras When Available
Some smartphones have separate telephoto cameras. If your phone has one, using the appropriate camera rather than relying heavily on digital zoom can produce better results.
However, the quality of each camera can vary depending on the phone and lighting conditions.
Use the Right Camera Mode
Portrait Mode for People
Portrait mode can create a blurred background that separates your subject from the surroundings.
It can work particularly well for individual portraits, but don’t assume it will always produce a perfect result. Fine details such as hair, glasses, and clothing can sometimes confuse the software.
Night Mode for Dark Scenes
Night mode can help capture brighter and more detailed photographs in low-light environments.
Keep the phone as steady as possible while the image is being captured. Moving the phone or subject too much can result in blur.
Pro or Manual Mode
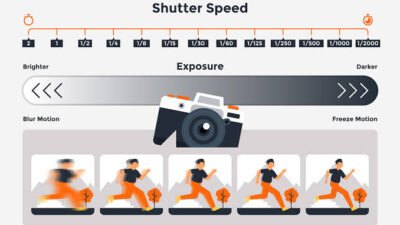
Some smartphones offer manual controls for settings such as ISO, shutter speed, white balance, and focus.
These controls can be useful when you want more control over the final image, especially when automatic settings are producing inconsistent results.
Keep Your Phone Steady
Hold the Phone With Both Hands
Camera shake can make an otherwise well-composed photograph look soft.
Hold the phone with both hands and keep your elbows relatively close to your body when taking photos.
Use a Stable Surface
For night photography, long exposures, or product photography, placing your phone on a stable surface can make a major difference.
A small phone tripod can also be useful if you regularly photograph yourself or create content.
Pay Attention to Your Background
Remove Distracting Objects
A great subject can still produce a weak photograph if the background is distracting.
Before pressing the shutter button, look around your subject. Check for unnecessary objects, bright spots, clutter, or items that appear to be coming out of someone’s head.
Taking a few seconds to adjust your position can completely change the photograph.
Use Simple Backgrounds
A simple wall, clean room, outdoor environment, or uncluttered area can help your subject stand out.
For portraits, you can also create separation by moving your subject farther away from the background.
Experiment With Different Angles
Don’t Take Every Photo From Eye Level
Changing your shooting position can make your photos more interesting.
Try taking a photograph from slightly above, below, or from the side. You can also move around your subject instead of taking several photos from exactly the same position.
Try Different Perspectives
For example, photographing a person from a low angle can make them appear more powerful, while a higher angle can create a different visual effect.
There is no single “correct” angle. The best choice depends on the subject and the story you want the photograph to tell.
Take More Than One Photo
Capture Different Expressions and Moments
When photographing people, don’t stop after taking one picture.
Take several frames while your subject changes their expression, pose, or position. This gives you more options when selecting the final image.
Review Your Photos Later
Instead of immediately deleting photographs because they don’t look perfect on the camera screen, review them carefully later.
Look for sharp focus, good expressions, balanced exposure, and distracting elements before choosing your best images.
Edit Your Photos Carefully
Start With Small Adjustments
Editing can improve a good photograph, but excessive editing can make an image look unnatural.
Start with basic adjustments such as exposure, contrast, highlights, shadows, white balance, and cropping.
Don’t Overdo Filters
Strong filters can sometimes hide the natural appearance of skin, colors, and details.
If you want your photos to have a consistent style, consider developing a simple editing approach instead of applying a different heavy filter to every image.
Practice With the Camera You Already Have
Learn What Your Phone Does Well
You don’t need the latest smartphone to improve your photography skills.
Spend time learning how your phone handles different lighting conditions, portraits, movement, and low-light scenes.
Understanding your equipment is often more valuable than simply upgrading it.
Practice Different Types of Photography
Try photographing the same subject in different ways. Take a portrait, photograph an object, capture a sunset, shoot indoors near a window, and experiment with nighttime scenes.
The more you practice, the easier it becomes to recognize good light, composition, and timing.
Final Thoughts
Taking better photos with your phone is mostly about making better decisions before you press the shutter button. Clean your lens, find good light, focus on your subject, control exposure, simplify your background, and pay attention to composition.
You don’t need professional camera equipment to start developing good photography skills. Your smartphone is already a powerful tool for learning the fundamentals of photography. The more you practice, the better you will become at seeing and creating strong images.