Getting a sharp photo isn’t only about owning an expensive camera or a high-quality lens. Your camera settings, focusing technique, lighting, shutter speed and even the way you hold your camera can all affect how sharp your images look.
Whether you’re using a smartphone, mirrorless camera or DSLR, these simple techniques can help you take sharper photos consistently.
1. Use a Fast Enough Shutter Speed
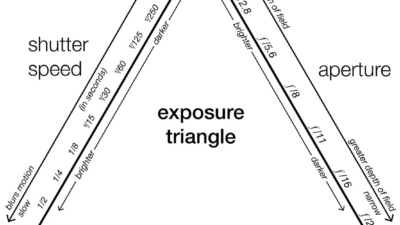
One of the most common reasons photos look blurry is using a shutter speed that’s too slow.
If you’re photographing a person who is standing relatively still, you can often start around 1/125s.
For moving subjects, you may need something faster, such as:
- 1/250s for walking subjects
- 1/500s for faster movement
- 1/1000s or faster for sports or very fast action
The faster your subject is moving, the faster your shutter speed generally needs to be.
Your focal length and camera stabilization also affect how slow you can safely shoot handheld.
2. Choose the Correct Focus Mode
Your camera’s autofocus mode should match what you’re photographing.
For stationary subjects, AF-S (Single AF) can be useful because the camera focuses and locks onto the subject.
For moving subjects, AF-C (Continuous AF) is usually a better choice because the camera continuously adjusts focus as the subject moves.
For example, if you’re photographing a person walking toward you, AF-C can help maintain focus as their distance from the camera changes.
3. Focus on Your Subject’s Eyes
When photographing people, the eyes are usually one of the most important areas to keep sharp.
If your camera has Eye AF, use it when appropriate.
Eye autofocus can make portrait photography considerably easier, particularly when you’re shooting with a wide aperture and shallow depth of field.
If your camera doesn’t have reliable Eye AF, select an appropriate focus point and place it over the subject’s eye.
A portrait can still look soft if the camera focuses on the nose, hair or background instead of the eye.
4. Don’t Always Shoot Wide Open
Using an aperture such as f/1.4, f/1.7 or f/1.8 can create beautiful background blur.
However, wide apertures also produce a very shallow depth of field.
This means that if you’re photographing someone at f/1.7, one eye can potentially be sharp while the other is slightly out of focus, particularly when the subject isn’t facing the camera directly.
If you’re struggling to keep your subject sharp, try stopping down slightly.
For example:
f/1.7 → f/2.2 → f/2.8
You may still get attractive background separation while giving yourself a little more depth of field.
5. Hold Your Camera Properly
Your shooting technique can make a noticeable difference.
When shooting handheld:
- Hold the camera firmly.
- Keep your elbows relatively close to your body.
- Support the lens with your other hand.
- Avoid gripping the camera too tightly.
- Keep your body stable.
- Press the shutter button smoothly.
Try not to jab the shutter button.
A gentle press reduces the chance of introducing unnecessary movement.
6. Use Image Stabilization When Appropriate
Many modern cameras and lenses include image stabilization.
Depending on the system, it may be called:
- IBIS
- OIS
- OSS
- VR
- IS
Image stabilization can help reduce blur caused by small movements from the photographer.
It’s particularly useful when photographing relatively stationary subjects at slower shutter speeds.
However, stabilization doesn’t freeze your subject.
If you’re photographing a person who is moving, you may still need a fast shutter speed even when stabilization is enabled.
7. Use Enough Light
Good lighting doesn’t just make a photo brighter. It can also make it easier to capture sharp images.
When there is plenty of light, you can use a faster shutter speed without pushing your ISO unnecessarily high.
For example, photographing a portrait outdoors during the day may allow you to use:
1/500s, f/2.8, ISO 100
whereas a dark indoor environment might force you to choose a slower shutter speed or higher ISO.
If you’re shooting indoors, consider using:
- Window light
- LED lights
- Continuous lighting
- Flash
- Reflectors
Better lighting gives you more options.
8. Don’t Rely Entirely on Digital Zoom
Digital zoom can reduce image quality, particularly on smartphones and cameras that crop the image significantly.
Instead, whenever possible, physically move closer to your subject or use an appropriate optical focal length.
For example, if you’re photographing a portrait with a 35mm lens and have enough space, moving closer can be better than heavily cropping the final image.
With interchangeable-lens cameras, choosing the right lens for the situation can also help you maintain detail.
9. Check Your Focus Before You Leave the Shoot
This is a simple habit that can save you from losing important photographs.
After taking a critical shot, zoom into the image on your camera’s screen and check:
Are the eyes sharp?
Is the main subject actually in focus?
Is there motion blur?
Did the camera focus on the background?
Don’t assume that a photo is sharp simply because it looks sharp when viewed as a tiny thumbnail.
This is especially important for paid shoots such as:
- Weddings
- Birthday portraits
- Studio sessions
- Corporate headshots
- Events
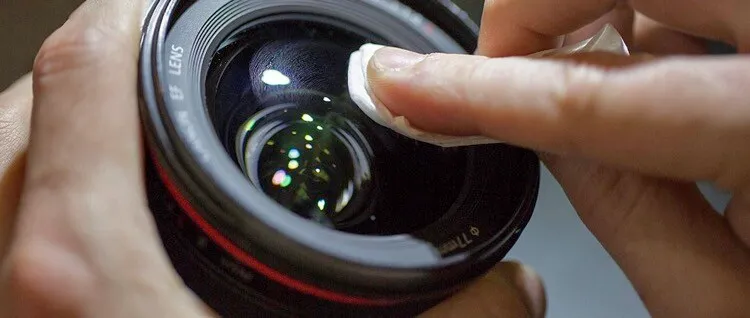
10. Keep Your Lens Clean
A dirty lens can reduce contrast and make images appear hazy or less detailed.
Before a shoot, check the front element of your lens.
Look for:
- Fingerprints
- Dust
- Smudges
- Water droplets
- Oil
Use a proper lens-cleaning cloth or lens-cleaning equipment rather than rubbing the lens with clothing or tissue.
A clean lens won’t magically make an out-of-focus photograph sharp, but it can help you get the best optical performance from your equipment.
Bonus Tip: Don’t Confuse Sharpness With Good Photography
A technically sharp photograph isn’t automatically a good photograph.
Composition, lighting, timing, expression and storytelling are just as important.
You can have an extremely sharp image that is boring.
You can also have a slightly imperfect image that captures an unforgettable moment.
The goal isn’t to make every pixel perfectly sharp.
The goal is to make sure the important parts of your photograph are sharp enough to communicate your idea.
A Simple Sharpness Checklist
Before taking an important photograph, quickly check:
- Shutter speed: Is it fast enough?
- Focus mode: AF-S or AF-C?
- Focus point: Is it on the subject?
- Aperture: Is your depth of field sufficient?
- Stabilization: Is it appropriate for the shot?
- Lighting: Do you have enough light?
- Lens: Is it clean?
- Subject: Is the subject moving?
These checks only take a few seconds once they become a habit.
Final Thoughts
Taking sharp photos consistently doesn’t require the most expensive camera.
Start by using an appropriate shutter speed, choosing the correct autofocus mode and focusing carefully on your subject. Pay attention to your aperture, hold your camera properly and make use of stabilization when appropriate.
Most importantly, learn to identify why an image isn’t sharp.
If the subject is blurry, check your shutter speed.
If the background is sharp but the subject isn’t, check your focus.
If only part of the subject is sharp, check your aperture and depth of field.
Once you understand these causes, getting consistently sharp photographs becomes much easier.
Frequently Asked Questions
Why are my photos blurry even though my camera focuses?
Your camera may have focused correctly but the shutter speed may have been too slow, causing motion blur. Camera shake or subject movement can both create blur even when autofocus works correctly.
What shutter speed should I use for portraits?
A good starting point is around 1/125s for relatively stationary people. Increase the shutter speed when your subject is moving.
Is f/1.8 good for sharp portraits?
Yes, but the depth of field can be very shallow. If you’re having difficulty keeping the subject’s eyes sharp, try stopping down to around f/2.2 or f/2.8.
Why is my background sharp but my subject blurry?
Your camera may have selected the wrong focus point or focused on the background. Using a single focus point or Eye AF can help.
Does image stabilization make every photo sharper?
No. Stabilization primarily helps reduce camera movement. It cannot completely prevent blur caused by a moving subject.
Should I always use a tripod for sharp photos?
No. A tripod is useful for landscapes, studio work, long exposures and other situations where camera stability is important, but many portraits and events can be photographed successfully handheld.
Is a more expensive lens always sharper?
Not necessarily. Lens quality matters, but technique, focus accuracy, shutter speed, lighting and aperture can have an equally significant effect on the final image.