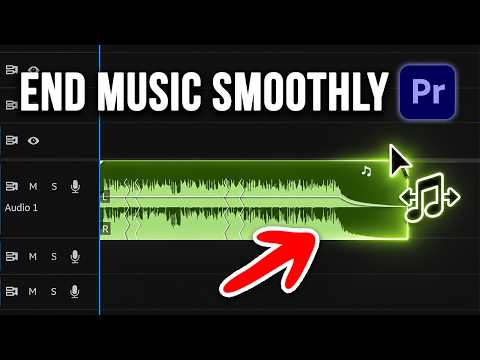
Have you ever imported a video into Adobe Premiere Pro and discovered that the audio is coming from only the left or right speaker?
This is a common problem, especially when working with footage recorded using cameras, external microphones, wireless microphones or other recording equipment.
The good news is that you usually don’t need to re-record the audio.
In many cases, the problem is caused by the way Premiere Pro interprets a mono recording inside a stereo sequence.
In this guide, I’ll show you several ways to fix audio that is playing on only one side in Premiere Pro.
Why Is My Audio Only Coming From One Side?
The most common reason is that your recording contains audio on only one channel.
For example, imagine your camera recorded:
Left channel → microphone audio
Right channel → empty
When you place that clip into a stereo sequence, Premiere Pro may send the microphone audio only to the left speaker.
The same thing can happen in reverse.
You might have:
Left channel → empty
Right channel → microphone audio
The result is audio that sounds like it is coming from only one side.
This is particularly common when using certain external microphones or recording setups.
Method 1: Use Fill Left or Fill Right
One of the quickest ways to fix one-sided audio in Premiere Pro is to use the Fill Left or Fill Right audio effect.
If your audio is coming from the left speaker
You can use:
Fill Right
This takes the left-channel audio and copies it to the right channel.
If your audio is coming from the right speaker
Use:
Fill Left
This copies the right-channel audio to the left channel.
How to Apply It
- Select your audio clip in the timeline.
- Open the Effects panel.
- Search for Fill Left or Fill Right.
- Drag the appropriate effect onto your audio clip.
- Play the clip again.
Your audio should now be heard through both sides.
This is one of the easiest solutions when you simply want the same recording coming from both speakers.
Method 2: Change the Audio Clip to Mono
If the recording is actually a single-channel microphone recording, converting the clip to mono can be a better long-term solution.
Instead of treating the recording as a stereo file, you’re telling Premiere Pro:
“This is one mono audio source.”
Premiere Pro can then place that mono signal in the centre of the stereo output.
How to Change the Audio Interpretation
Before changing the clip, make sure you’re working with the original clip in your Project panel.
- Find the audio/video clip in the Project panel.
- Right-click the clip.
- Select Modify.
- Choose Audio Channels.
- Check how the clip is currently being interpreted.
- Change the appropriate setting so the recording is treated as mono.
- Click OK.
The exact options you see can vary depending on your Premiere Pro version and the type of media you’re using.
After changing the interpretation, you may need to remove the existing instance from your timeline and add the modified clip again.
Method 3: Use the Audio Channels Settings Before Editing
If you regularly receive footage where the microphone is recorded onto only one channel, it’s better to fix the problem early rather than discovering it after you’ve finished editing.
Before you start editing:
- Import your footage.
- Select the clip in the Project panel.
- Right-click it.
- Choose Modify → Audio Channels.
- Check how Premiere Pro has interpreted the recording.
- Set the channels appropriately for your microphone setup.
This can save you from having to manually fix dozens of clips later.
Method 4: Use the Audio Track Mixer
Another option is to adjust the channel routing using Premiere Pro’s audio controls.
Open:
Window → Audio Track Mixer
Then check the track containing your audio.
Depending on your setup, you can adjust the channel routing or use effects to make sure the signal is being sent correctly.
This method is particularly useful when you’re working on a larger project and need more control over how multiple audio tracks are routed.
However, for a simple one-sided microphone recording, Fill Left/Fill Right or correctly interpreting the clip as mono is usually easier.
What If the Audio Is Very Quiet on One Side?
If the audio isn’t completely missing from one channel but is significantly louder on one side, you may be dealing with a channel-balance problem rather than a completely empty channel.
In this situation, check the clip’s:
Panning
If the audio is panned heavily to the left or right, adjust it toward the centre.
You can do this using the audio controls in Premiere Pro.
A centred mono recording should generally be heard from both speakers when played through a normal stereo system.
How to Check Which Channel Contains Your Audio
Before changing anything, listen carefully.
Put on headphones and ask:
Is the voice only in my left ear?
or:
Is the voice only in my right ear?
This can help you determine which channel contains the recording.
You can also look at the audio waveform in Premiere Pro.
If you have separate left and right waveforms, you may notice that one channel contains a waveform while the other is almost completely flat.
For example:
Left: waveform visible
Right: almost flat
That strongly suggests the audio was recorded only on the left channel.
Why Does This Happen With External Microphones?
This problem can happen because of the way some microphones and adapters connect to cameras.
For example, a microphone may send its signal to a single channel while the camera records the input as a stereo track.
The result is technically a stereo file, but only one side contains the actual microphone signal.
This doesn’t necessarily mean your microphone is faulty.
It can simply be a matter of how the recording device handles the input.
What If I’m Editing Wedding Videos?
If you’re editing wedding videos, this problem can become particularly annoying because you may have multiple audio sources:
- Camera microphone
- Wireless microphone
- Recorder
- DJ feed
- Audio from the venue
- External recorder
Imagine finishing a 30-minute wedding highlight and then discovering that the groom’s microphone only plays through the left ear.
You don’t necessarily need to start the edit again.
First identify which channel contains the useful audio, then use an appropriate method to make the signal play correctly through both sides.
For a simple voice recording, converting the recording to mono is often a sensible approach.
Mono vs Stereo: What’s the Difference?
Understanding this can help prevent the problem in the future.
Mono
Mono means there is one audio channel.
When played through a stereo system, the same signal can be sent to both the left and right speakers.
Mono is common for:
- Interviews
- Lavalier microphones
- Voice recordings
- Single-person dialogue
Stereo
Stereo contains separate left and right channels.
It is useful for recordings where the difference between the left and right channels is intentional.
For example:
- Music
- Ambient recordings
- Some camera microphones
- Certain sound effects
If your microphone is recording one person speaking, you generally don’t gain much by having that same voice stuck on only one side.
Should You Convert Wedding Dialogue to Mono?
For many dialogue recordings, yes.
If a groom’s lavalier microphone recorded only one channel, turning it into a centred mono signal can make the dialogue much easier to listen to.
The important thing is to distinguish between:
A genuine stereo recording
and
A mono microphone accidentally stored in a stereo container.
Don’t convert everything to mono automatically.
If the recording contains intentional stereo information, you may want to preserve it.
Quick Fix: The Easiest Method
If you just need to fix the problem quickly:
Audio playing on the left only?
Use:
Fill Right
Audio playing on the right only?
Use:
Fill Left
Then play the clip again.
If the audio is still behaving strangely, check the clip’s channel interpretation and panning.
How to Prevent the Problem During Your Next Shoot
The best solution is to catch the problem before you get home.
Whenever you connect a microphone to your camera:
- Connect the microphone.
- Record a short test clip.
- Put on headphones.
- Listen to the recording.
- Check whether the sound is coming from both sides.
- Check the recording level.
- Make sure the microphone is actually receiving sound.
This takes less than a minute.
That one-minute test can save you hours of troubleshooting later.
This is especially important before weddings, interviews and paid productions.
A Simple Workflow for Dialogue Audio
For interviews and wedding speeches, I recommend keeping your workflow simple.
Before recording
Check:
Microphone → Camera/Recorder → Headphones
After recording
Check:
Audio channel → Volume → Noise → Clipping
During editing
Check:
Mono/stereo interpretation → Panning → Levels → EQ → Compression
This helps you catch problems before the final export.
What If the Audio Is Still Only Coming From One Side?
If you’ve tried Fill Left or Fill Right and nothing changes, check a few other things.
Check your headphones
Try another pair of headphones.
You don’t want to spend an hour fixing a Premiere Pro project only to discover that your headphones have a faulty channel.
Check your speakers
Play another video outside Premiere Pro.
If everything else also plays on one side, the problem may be your computer, headphones or speakers.
Check the original recording
Open the original video in another media player.
If the original recording is also one-sided, the issue probably happened during recording.
If the original recording is normal but Premiere Pro is playing it incorrectly, check the clip’s audio interpretation and sequence settings.
Final Thoughts
Audio that plays through only one side can be frustrating, but it’s usually a straightforward problem to fix.
If your microphone recorded audio on only one channel, you can often use Fill Left, Fill Right, or change the clip’s audio-channel interpretation so that Premiere Pro treats the recording appropriately.
For future shoots, always test your microphone with headphones before starting the actual production.
A few seconds of testing can prevent a major audio problem later.
And remember: good video with bad audio is still a bad viewing experience.
Pay attention to your audio during the shoot, not just during editing.
Frequently Asked Questions
Why is my audio only playing on the left side in Premiere Pro?
Your recording may contain audio only on the left channel while Premiere Pro is treating the clip as stereo.
How do I make left-channel audio play through both speakers?
Use the Fill Right audio effect to copy the left-channel signal to the right channel.
How do I make right-channel audio play through both speakers?
Use the Fill Left audio effect.
Should dialogue be mono or stereo?
Dialogue from a single microphone is often better handled as mono, especially when the same voice has been recorded on only one channel.
Does this mean my microphone is damaged?
Not necessarily. The microphone may simply have been connected or configured so that its signal was recorded to only one channel.
Can I fix one-sided audio after recording?
Yes. Premiere Pro provides several ways to correct channel imbalance or route a single-channel recording to both sides.
How can I prevent one-sided audio when filming?
Record a short test clip before the shoot and monitor it with headphones. Check that the microphone signal is being recorded correctly before you begin.